How to customize your environment for JSX and CSS.
The following are steps needed to create your first react page with JSX and CSS. By the end of these steps your will build a react page with JSX and CSS.
Table of contents
- Modify App.js
- Add style code
- Add JavaScript to userInput.js file
- Add JavaScript to userOutput.js file
- Run npm start
- Congrats you have your first react page now
Modify App.js
Add new JSX code to make your own pages. JSX allows you to write HTML code in JavaScript way, without using syntax like createElement() or appendChild().
- Open your App.js and enter the code belows.
import React, { Component } from "react";
import IN from "./JS/userInput";
import OUT from "./JS/userOutput";
import "./stylesheet/app.css";

class App extends Component {
    state = {
      condition: [
        {
          type: "REACT"
        },
        {
          type: "C++"
        }
      ]
    };

    SwitchName = event => {
      this.setState({
        condition: [
          {
            type: event.target.value
          },
          {
            type: "C++"
          }
        ]
      });
    };

    render() {
      return (
        <div className="App">
          <h1 className="project_title">This is my Your React Project</h1>
          <OUT type={this.state.condition[0].type}>
            This is the child of first box
          </OUT>
          <OUT type={this.state.condition[1].type} />
          <IN name={this.state.condition[0].type} changed={this.SwitchName} />
        </div>
      );
    }
}
export default App;
Add style code
In this step, you will know how to add more css code to your own react project.
Open you app.css file, and add more css code in it.
Add the code below:
At this stage, you can add more personal preference to the css code to make it more appealing.
.project_title {
 color: darkred;
}

.p {
 margin: 10px auto;
 box-sizing: border-box;
 padding: 30px;
 border: 1px solid #000000;
 font-weight: bolder;
 width: 300px;
}

.p:nth-child(3) {
 cursor: pointer;
}

.p:nth-child(3):hover {
 color: rebeccapurple;
}

.inputspace {
 width: 300px;
}
Add JavaScript to userInput.js file
At this step, you will need to add more JSX code in your userInput.js file. In your userInput.js, and add some JSX in it.
- Open the userInput.js and add the following code below.
import React from "react";
const userInput = props => {
    return (
      <div>
        <input
          className="inputspace"
          type="text"
          onChange={props.changed}
          value={props.name}
        />
      </div>
    );
};

export default userInput;
Add JavaScript to userOutput.js file
At this step, you will need to add more JSX code in your userOutput.js file. In your userOutput.js, and add some JSX in it.
- Open the userOutput.js and add the following code below.
import React from "react";

const userOutput = props => {
    return (
      <div className="p">
        <p onClick={props.click}>{props.type} is fine</p>
        <p>{props.children}</p>
      </div>
    );
  };

export default userOutput;
Run npm start
- Open your VScode “Terminal” and start typing.
$ npm start
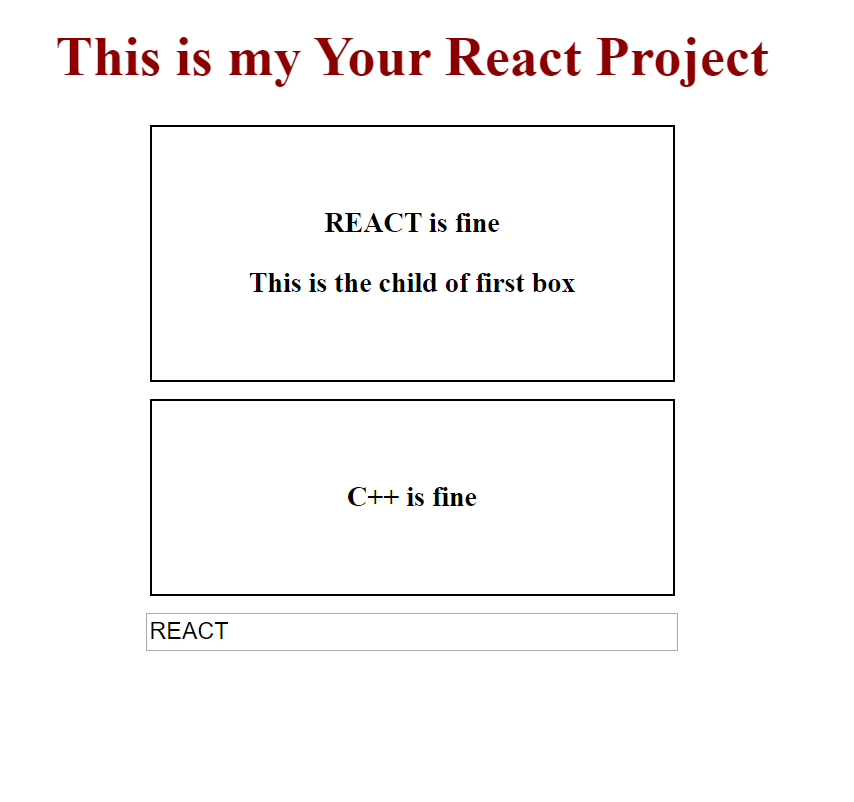
After the build is done, you will see this in “http://localhost:8001/”
Congrats you have your first react page now