How to set up your first react page with JSX and CSS.
The following are steps needed to customize and configure your react environment for JSX with CSS. By the end of these steps your react environment will be ready to use JSX with CSS.
Table of contents
- Install loader
- Change your webpack.config.js file
- Install babel plugin
- Configure the .babelrc file
- Create folders and files

Install loader
In order to add style in your website, you must install css-loader first. Its purpose is to load the CSS file.
Open your VSCode “Terminal”, and enter the following code.
$ npm install css-loader --save-dev
$ npm install style-loader --save-dev
After the installation, your package.json should look like this
{
    "name": "createReactApp",
	  "version": "1.0.0",
	  "description": "",
	  "main": "index.js",
	  "scripts": {
  	  "start": "webpack-dev-server --mode development --open --hot",
		  "build": "webpack --mode production"
	  },
	  "keywords": [],
	  "author": "",
	  "license": "ISC",
	  "dependencies": {
    		"react": "^16.13.0",
	  	"react-dom": "^16.13.0",
	  	"webpack": "^4.42.0",
	  	"webpack-cli": "^3.3.11",
	  	"webpack-dev-server": "^3.10.3"
	  },
	  "devDependencies": {
    	"@babel/core": "^7.8.7",
	  	"@babel/preset-env": "^7.8.7",
	  	"@babel/preset-react": "^7.8.3",
	  	"babel-loader": "^8.0.1",
	  	"css-loader": "^3.4.2",
	  	"html-webpack-plugin": "^3.2.0",
      "style-loader": "^1.1.3"
	  }
}
Change your webpack.config.js file
To use the package you just installed, you need to change you webpack.config.js file.
Open your webpack.config.js file, you need to add this in the rule section.
{ test: /\.css$/, loader: ["style-loader", "css-loader"] }
Install babel plugin
Because we are using the class base react in this instruction; therefore, in order to use class components, we need to install a babel plugin.
Open your VSCode “Terminal”, and enter the following code.
$ npm install @babel/plugin-proposal-class-properties --save-dev
After installation, your package.json should look like this
{
   "name": "createReactApp",
	  "version": "1.0.0",
	  "description": "",
	  "main": "index.js",
	  "scripts": {
 	  "start": "webpack-dev-server --mode development --open --hot",
		  "build": "webpack --mode production"
	  },
	  "keywords": [],
	  "author": "",
	  "license": "ISC",
	  "dependencies": {
   	"react": "^16.13.0",
	  	"react-dom": "^16.13.0",
	  	"webpack": "^4.42.0",
	  	"webpack-cli": "^3.3.11",
	  	"webpack-dev-server": "^3.10.3"
	  },
	  "devDependencies": {
   	"@babel/core": "^7.8.7",
     "@babel/plugin-proposal-class-properties": "^7.8.3",
	  	"@babel/preset-env": "^7.8.7",
	  	"@babel/preset-react": "^7.8.3",
	  	"babel-loader": "^8.0.1",
	  	"css-loader": "^3.4.2",
	  	"html-webpack-plugin": "^3.2.0",
     "style-loader": "^1.1.3"
	  }
}
Configure the .babelrc file
In order to make usage of the babel plugin, we need to add a configuration to the .babelrc file.
Open your .babelrc file, you need to change your .babelrc file to the following code.
{
    "presets": ["@babel/env", "@babel/preset-react"],
    "plugins": [["@babel/plugin-proposal-class-properties", { "loose": true }]]
}
Create folders and files
This step is not very important, but it will be best if you want to keep your folder looks clean.
Open your VSCode “Terminal”, and enter the following code.\
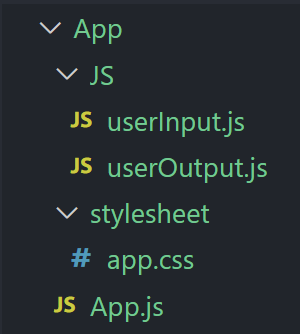
$ mkdir App
$ cd App
$ mkdir JS
$ mkdir stylesheet
$ cd JS
$ touch userInput.js
$ touch userOutput.js
$ cd ../stylesheet
$ touch app.css

##At last, you need to move your App.js in the App folder
After this step, you should see this in the left sidebar in your VSCode.